FAQ INSTALL WS OIL INCREASED PRESSURE KIT
FAQ INSTALL WS OIL INCREASED PRESSURE KIT
The WS oil pressure increase kit consists of 2 washers, WS front control spring, WS rear control spring unit.
The kit is mounted inside the engine underside. To get there, the engine oil must first be drained and the oil pan removed.
The example pictures are of an RX8 S1 motor, but the installation is the same for all RX motors. Only the size of the front cover cap screw can vary.
Installation of the front WS control spring and 2 washers:
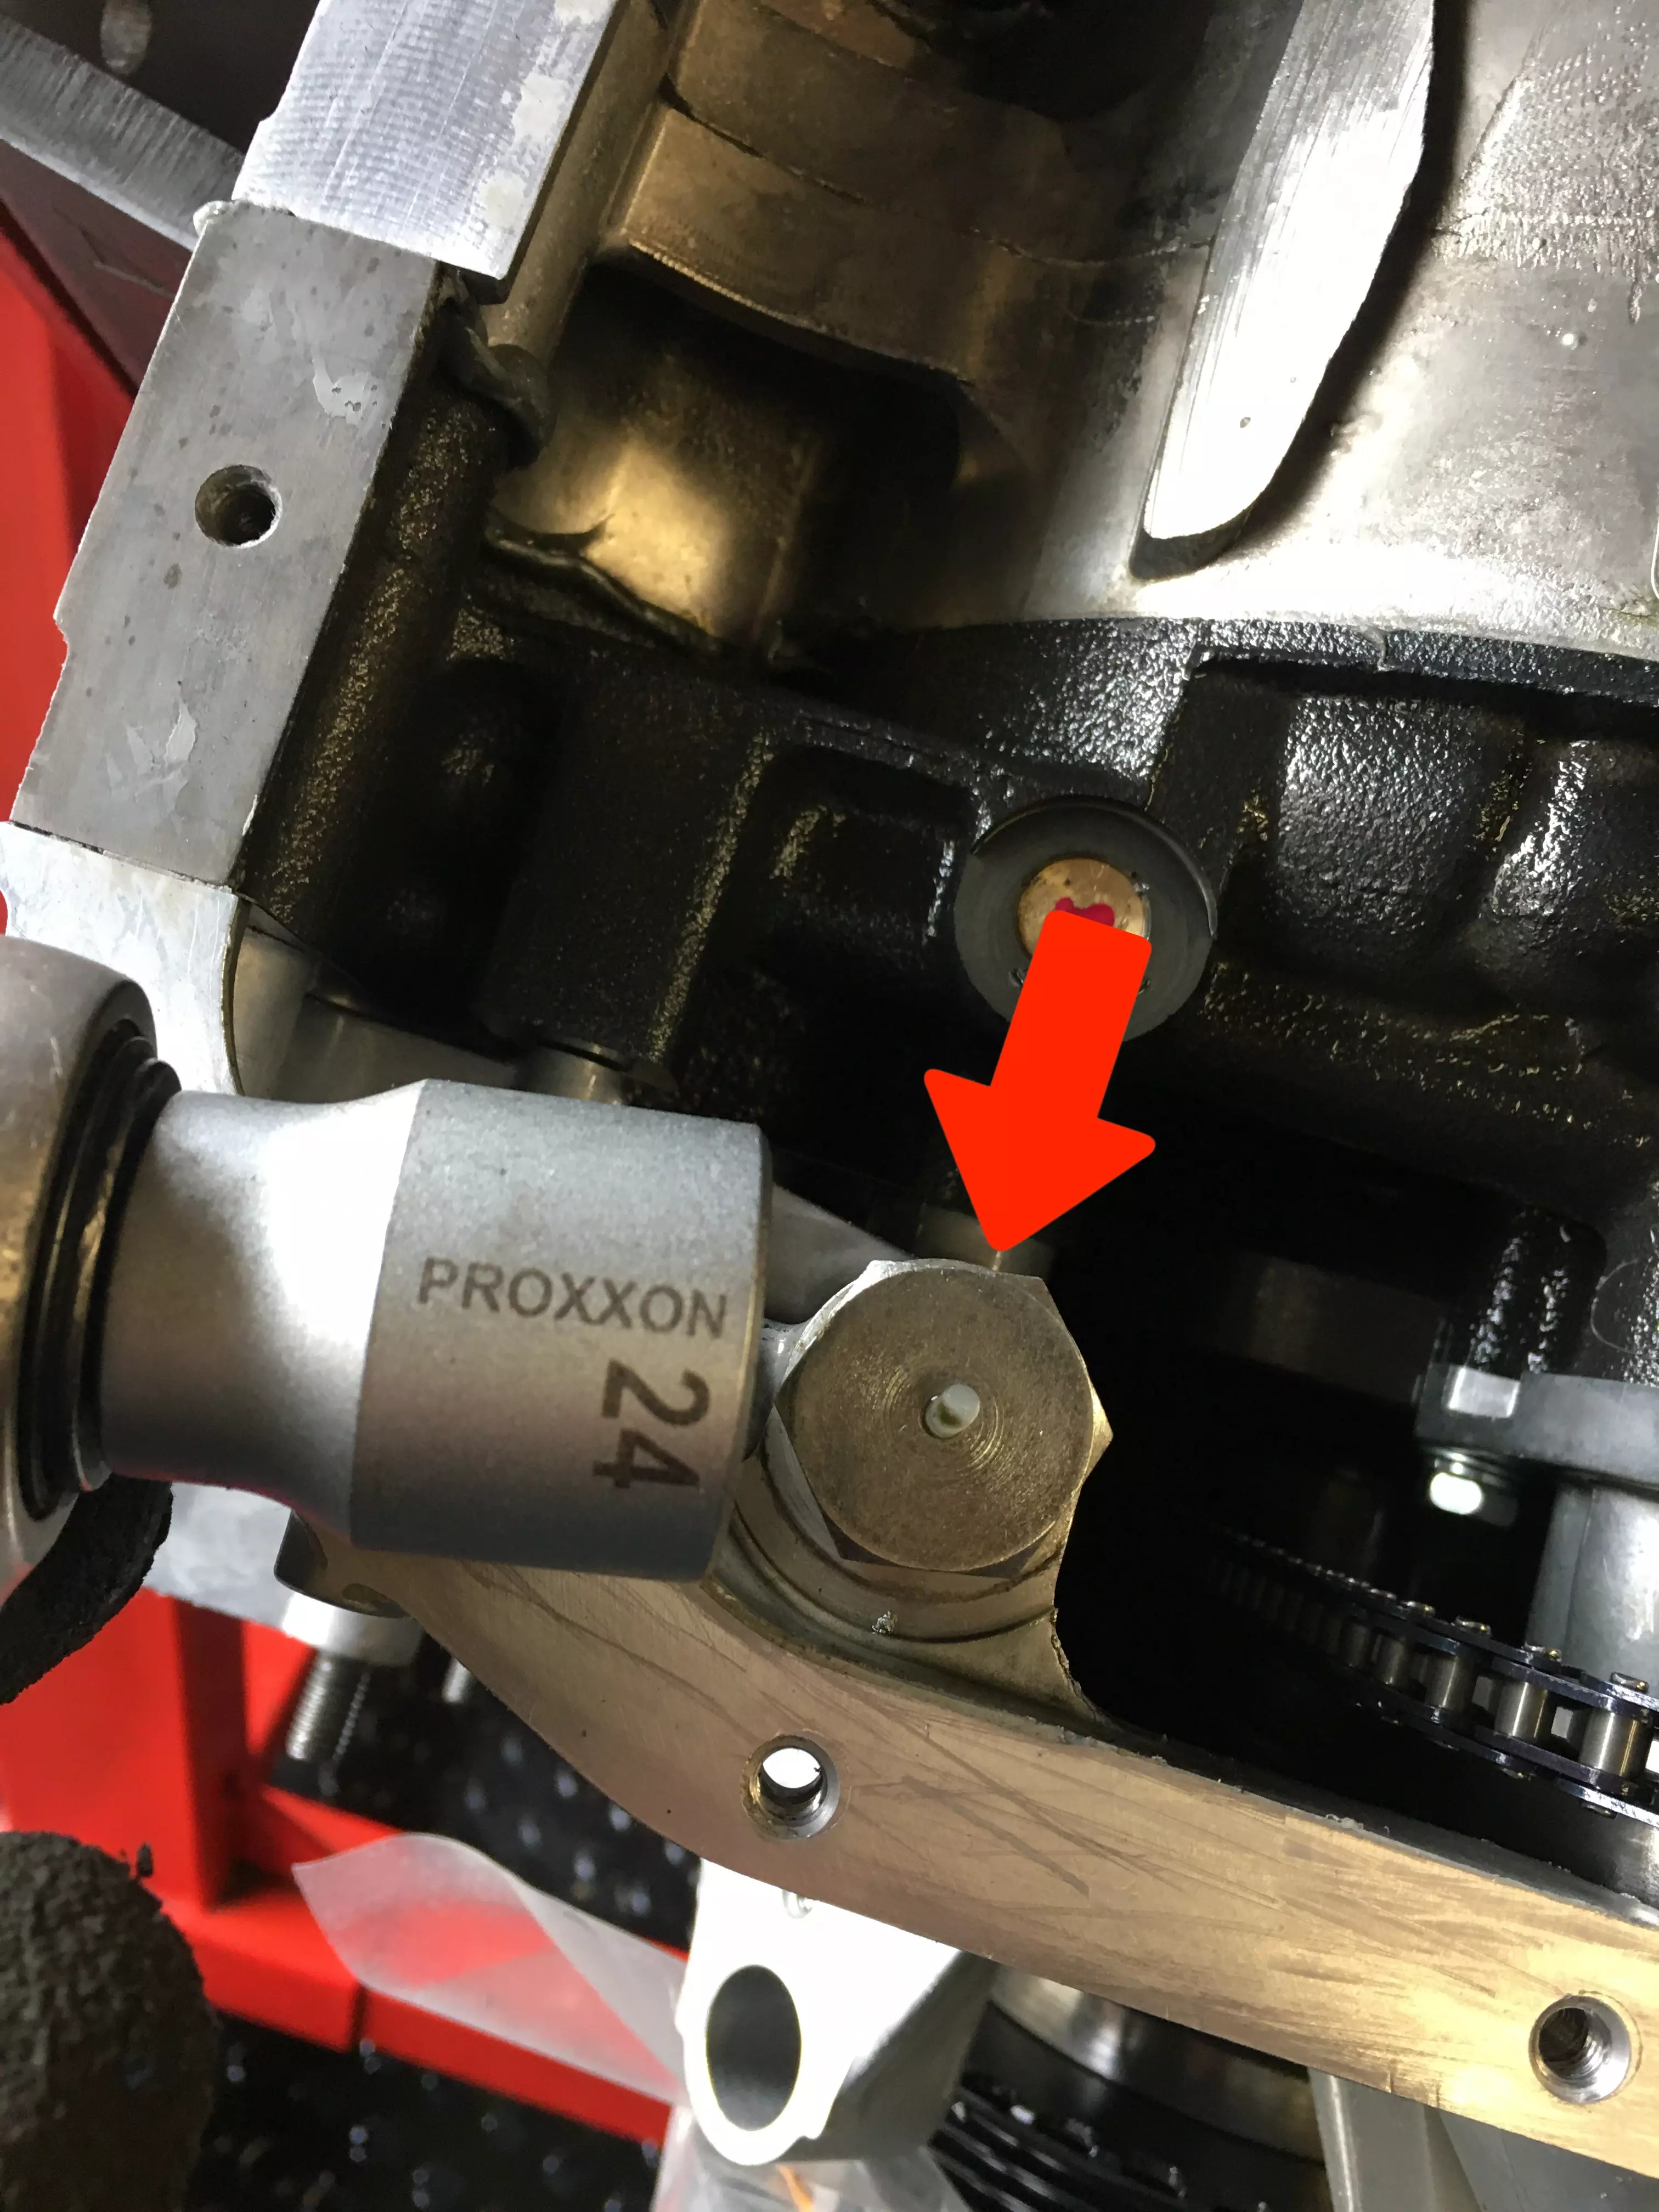
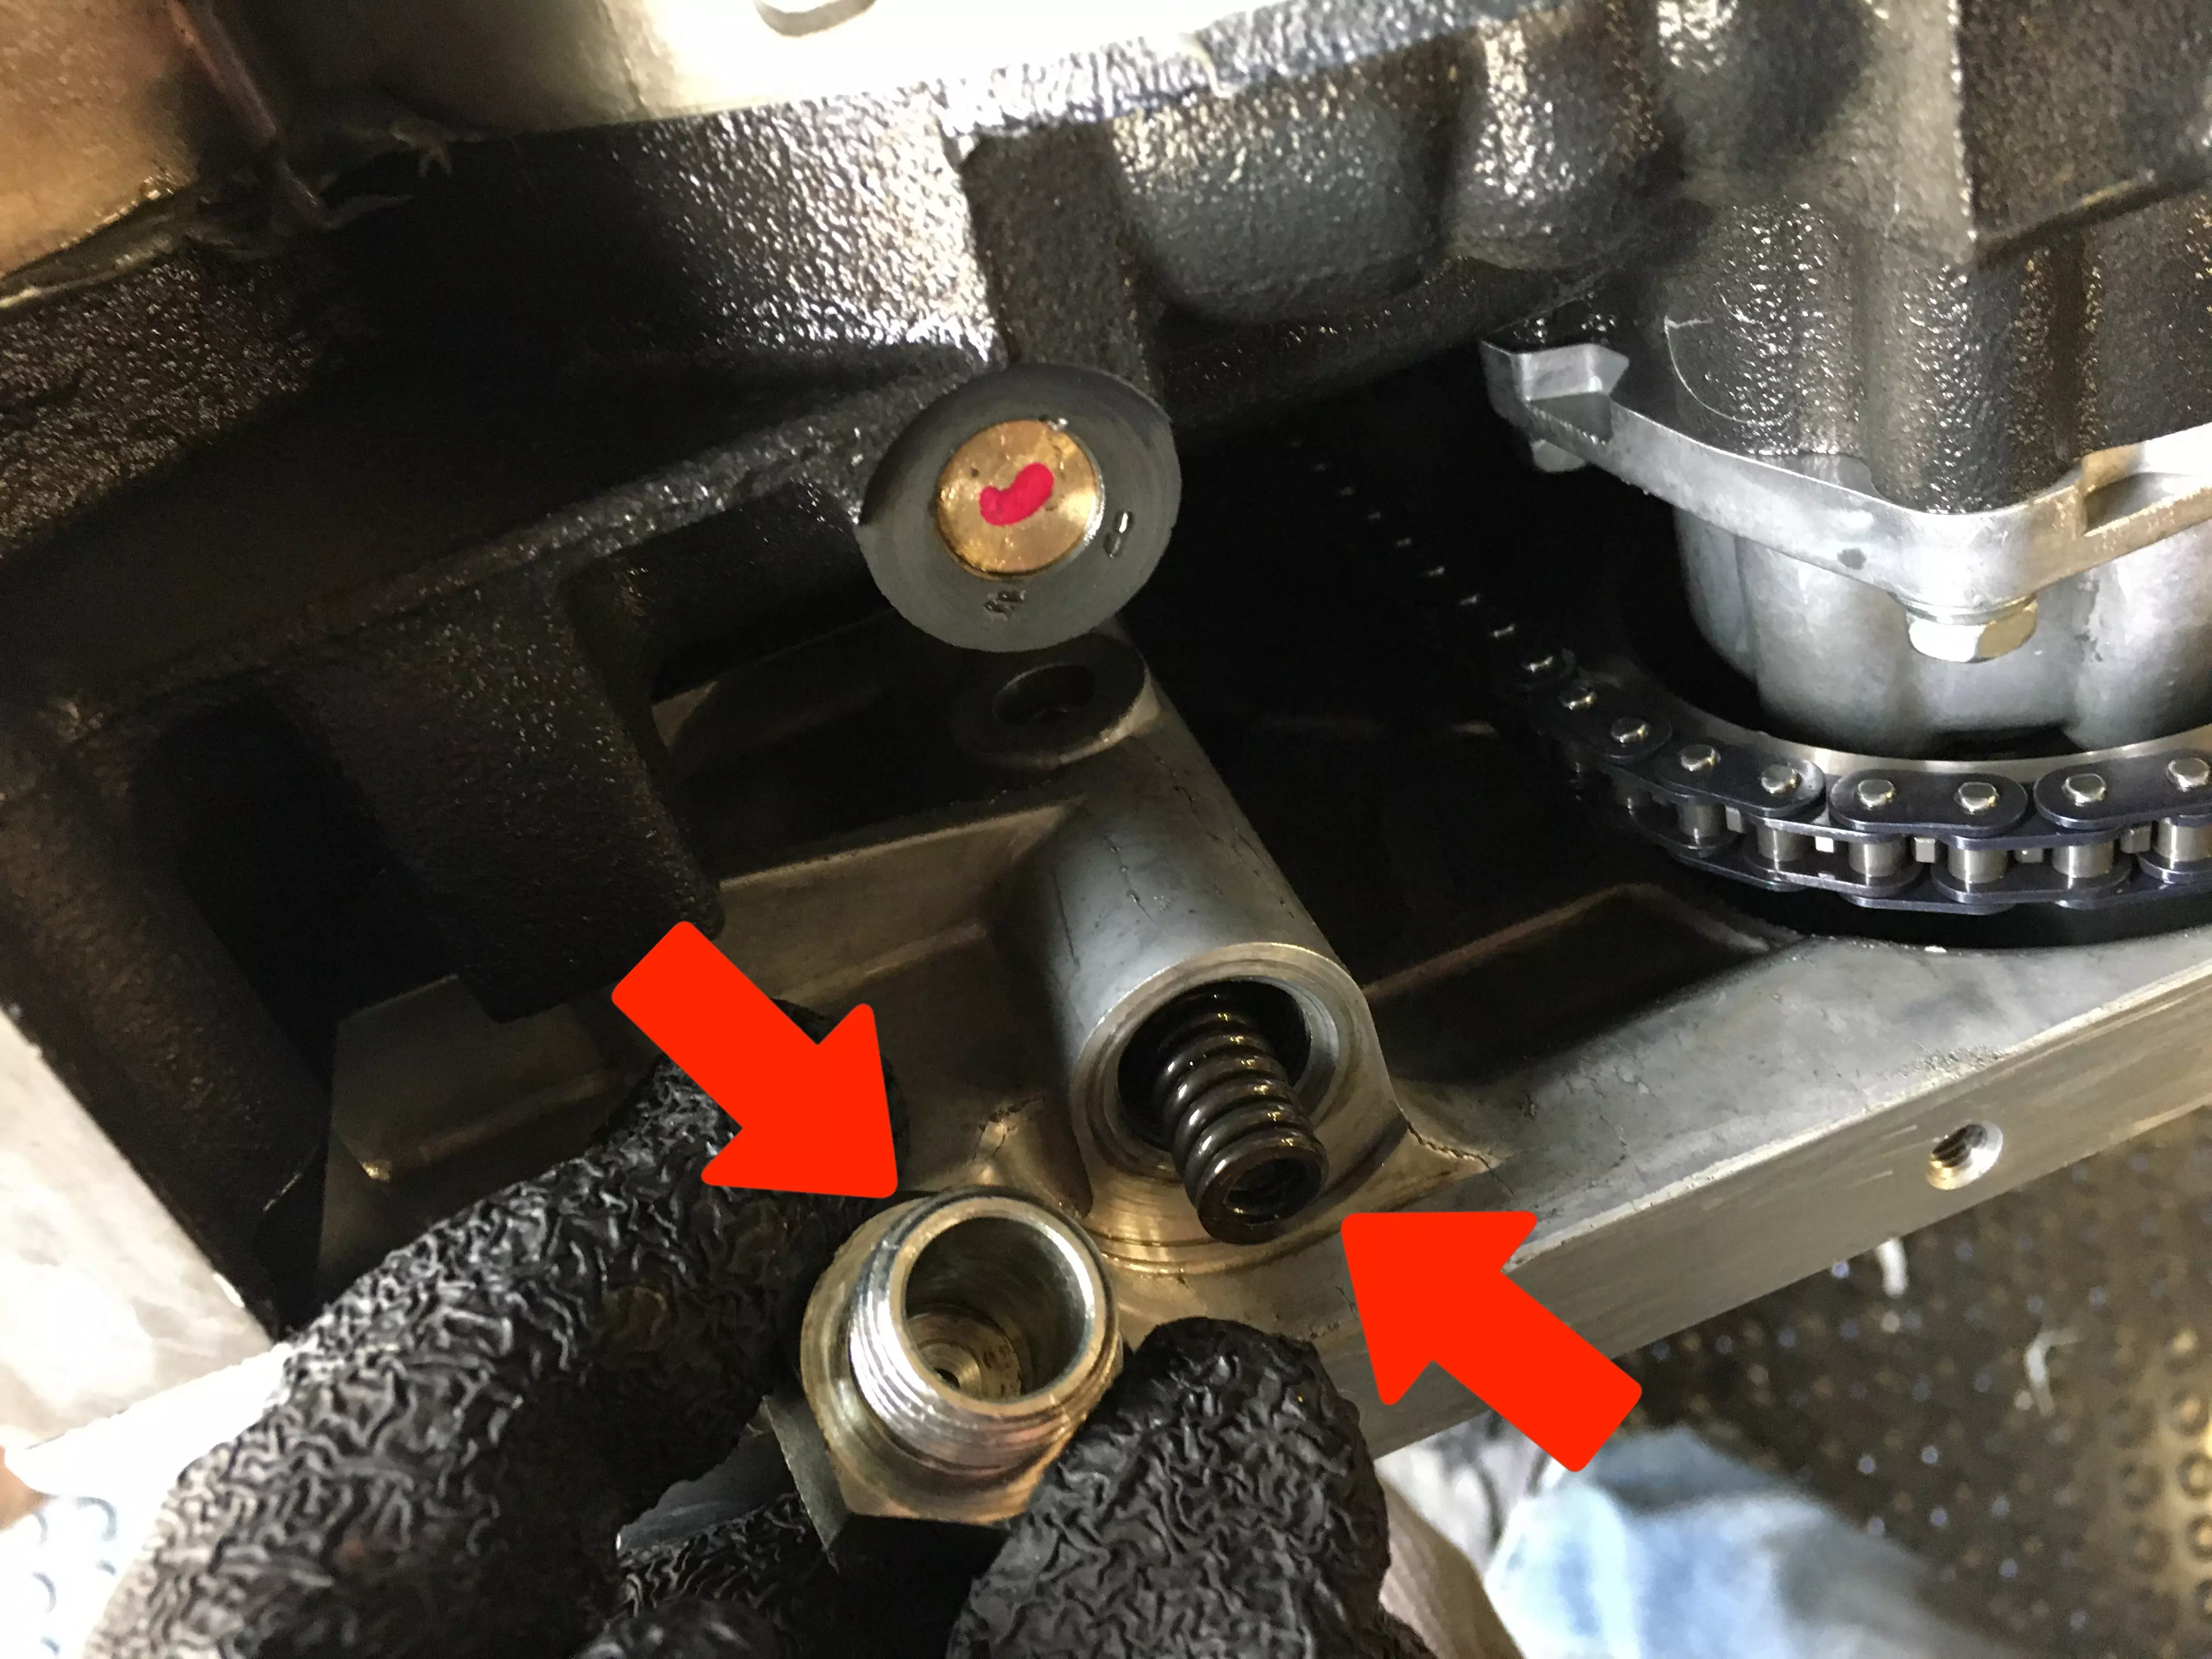
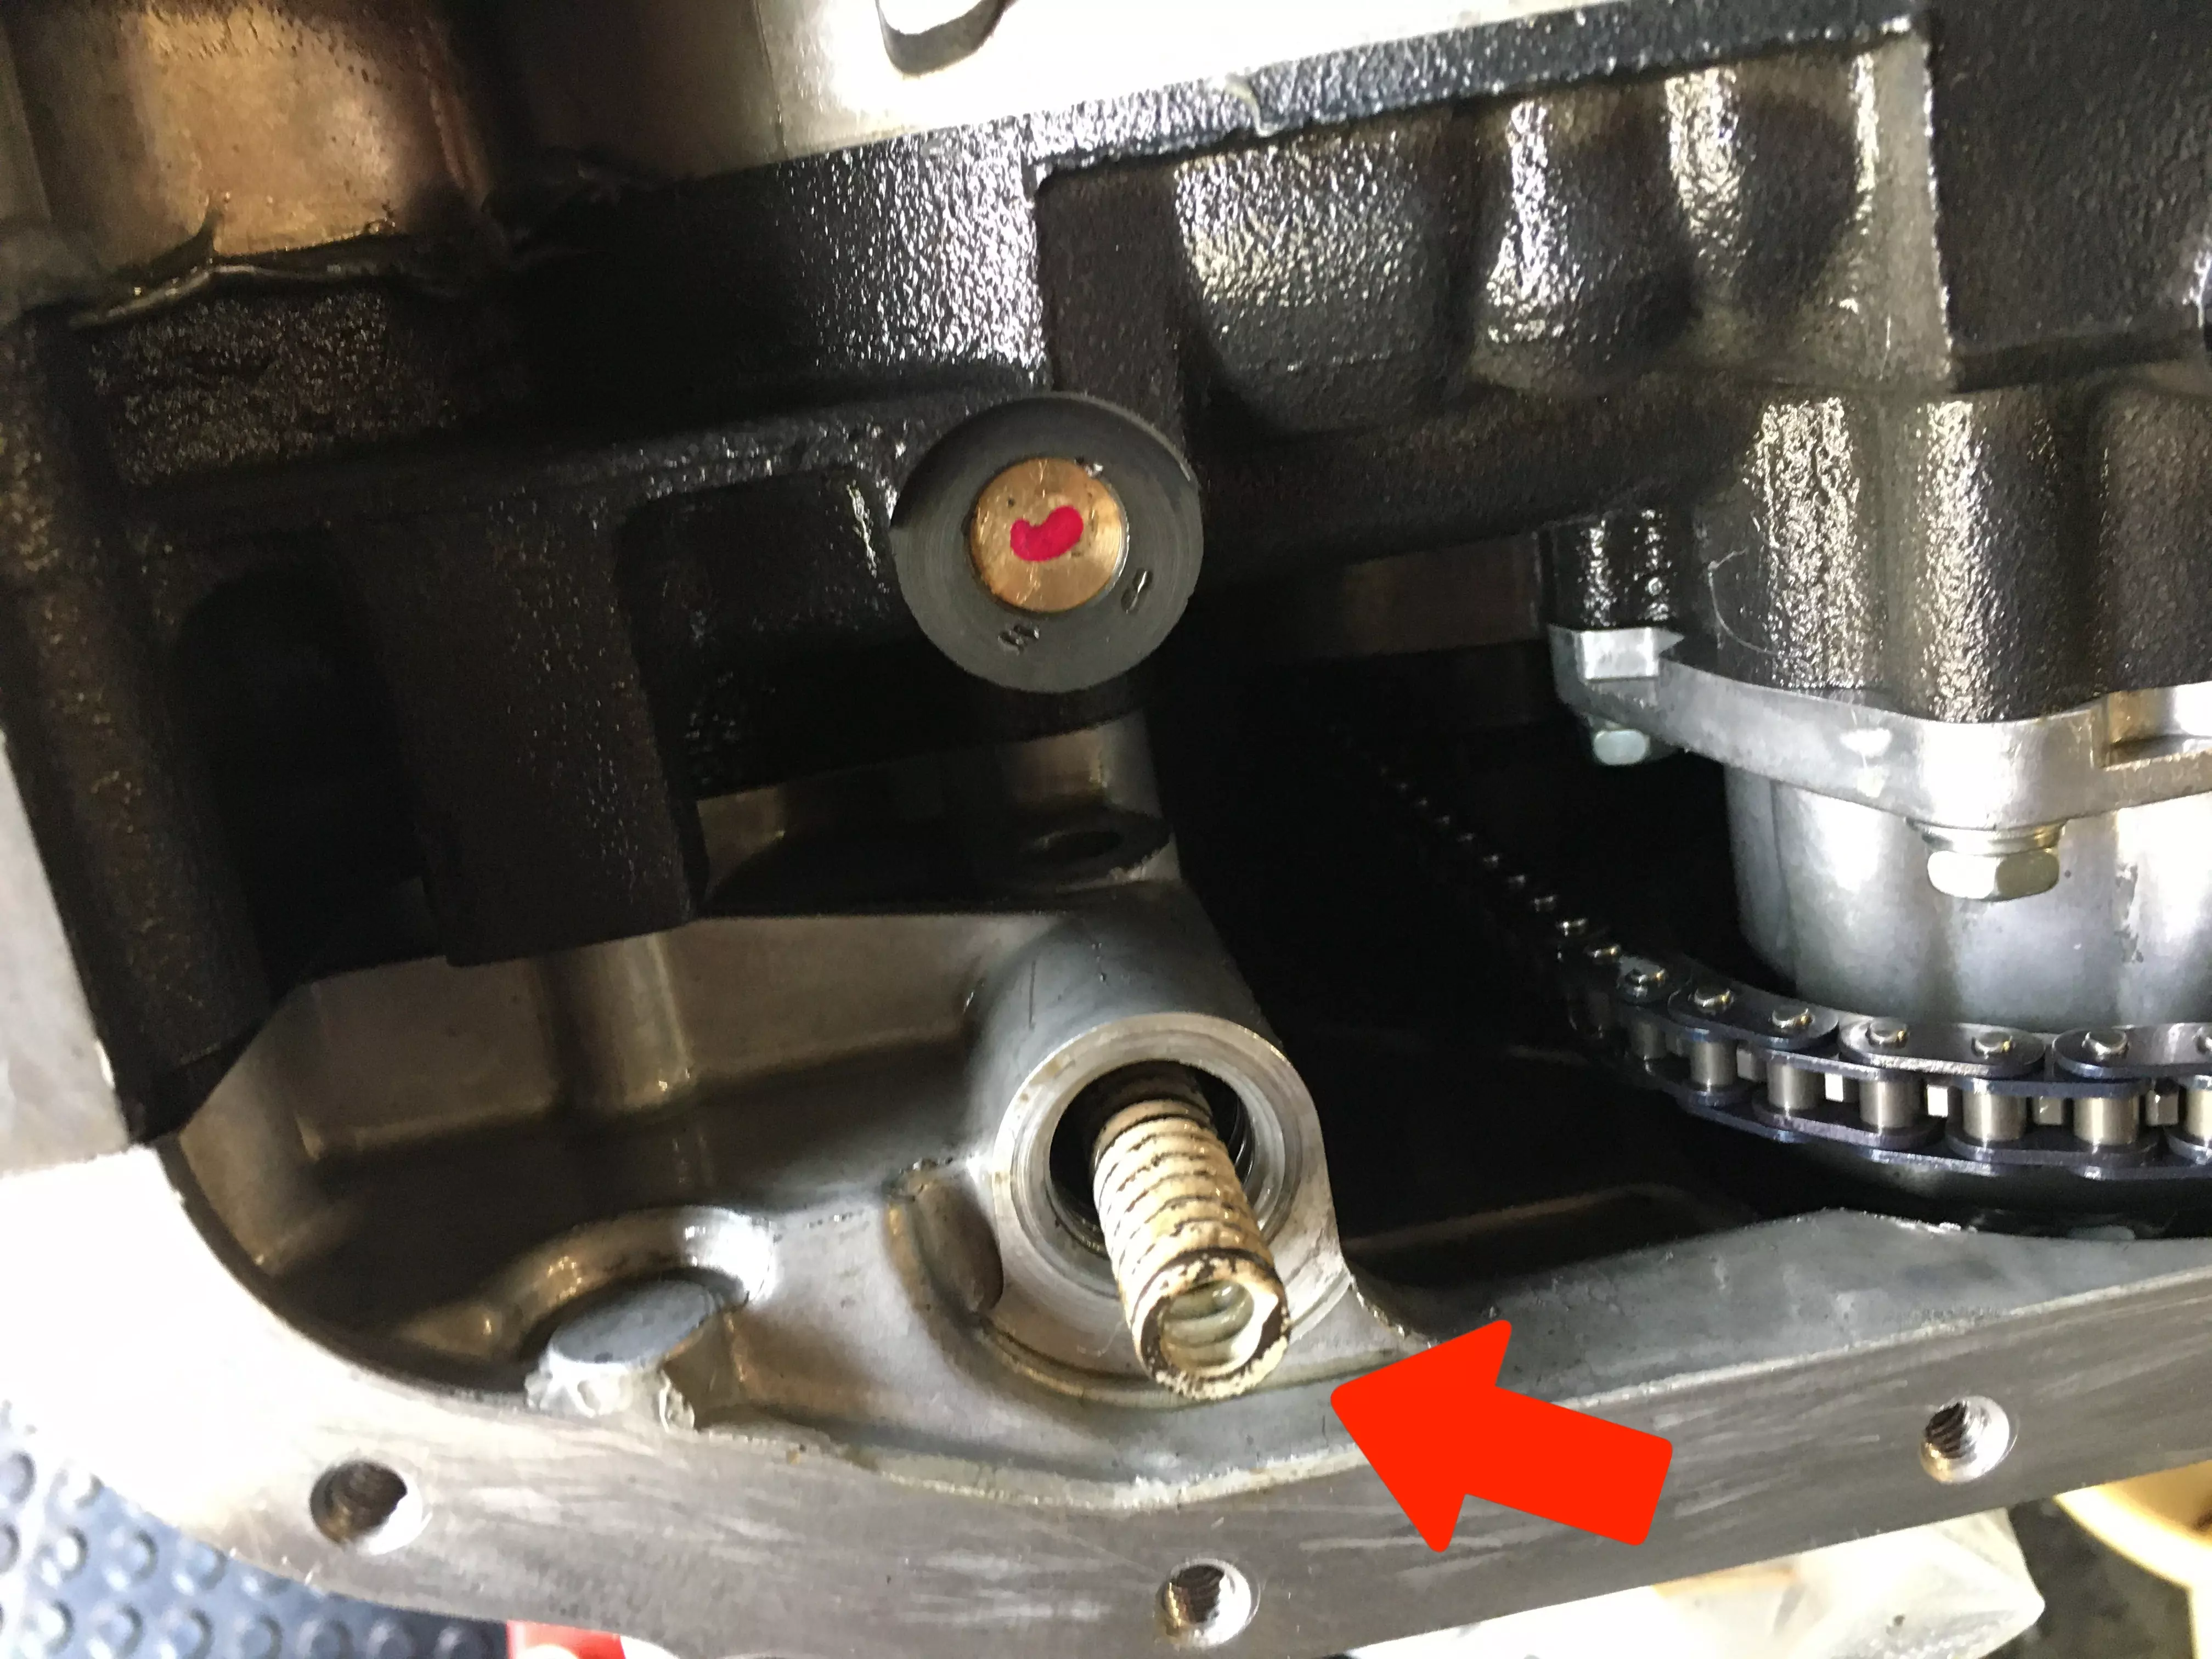
There is a cap screw at the bottom of the aluminum front cover, open it counterclockwise with a 24 mm open-ended spanner or ratchet and unscrew it.

Take the old OEM spring out of the inner channel. Be careful that the bypass piston does not fly out of the inner tube.
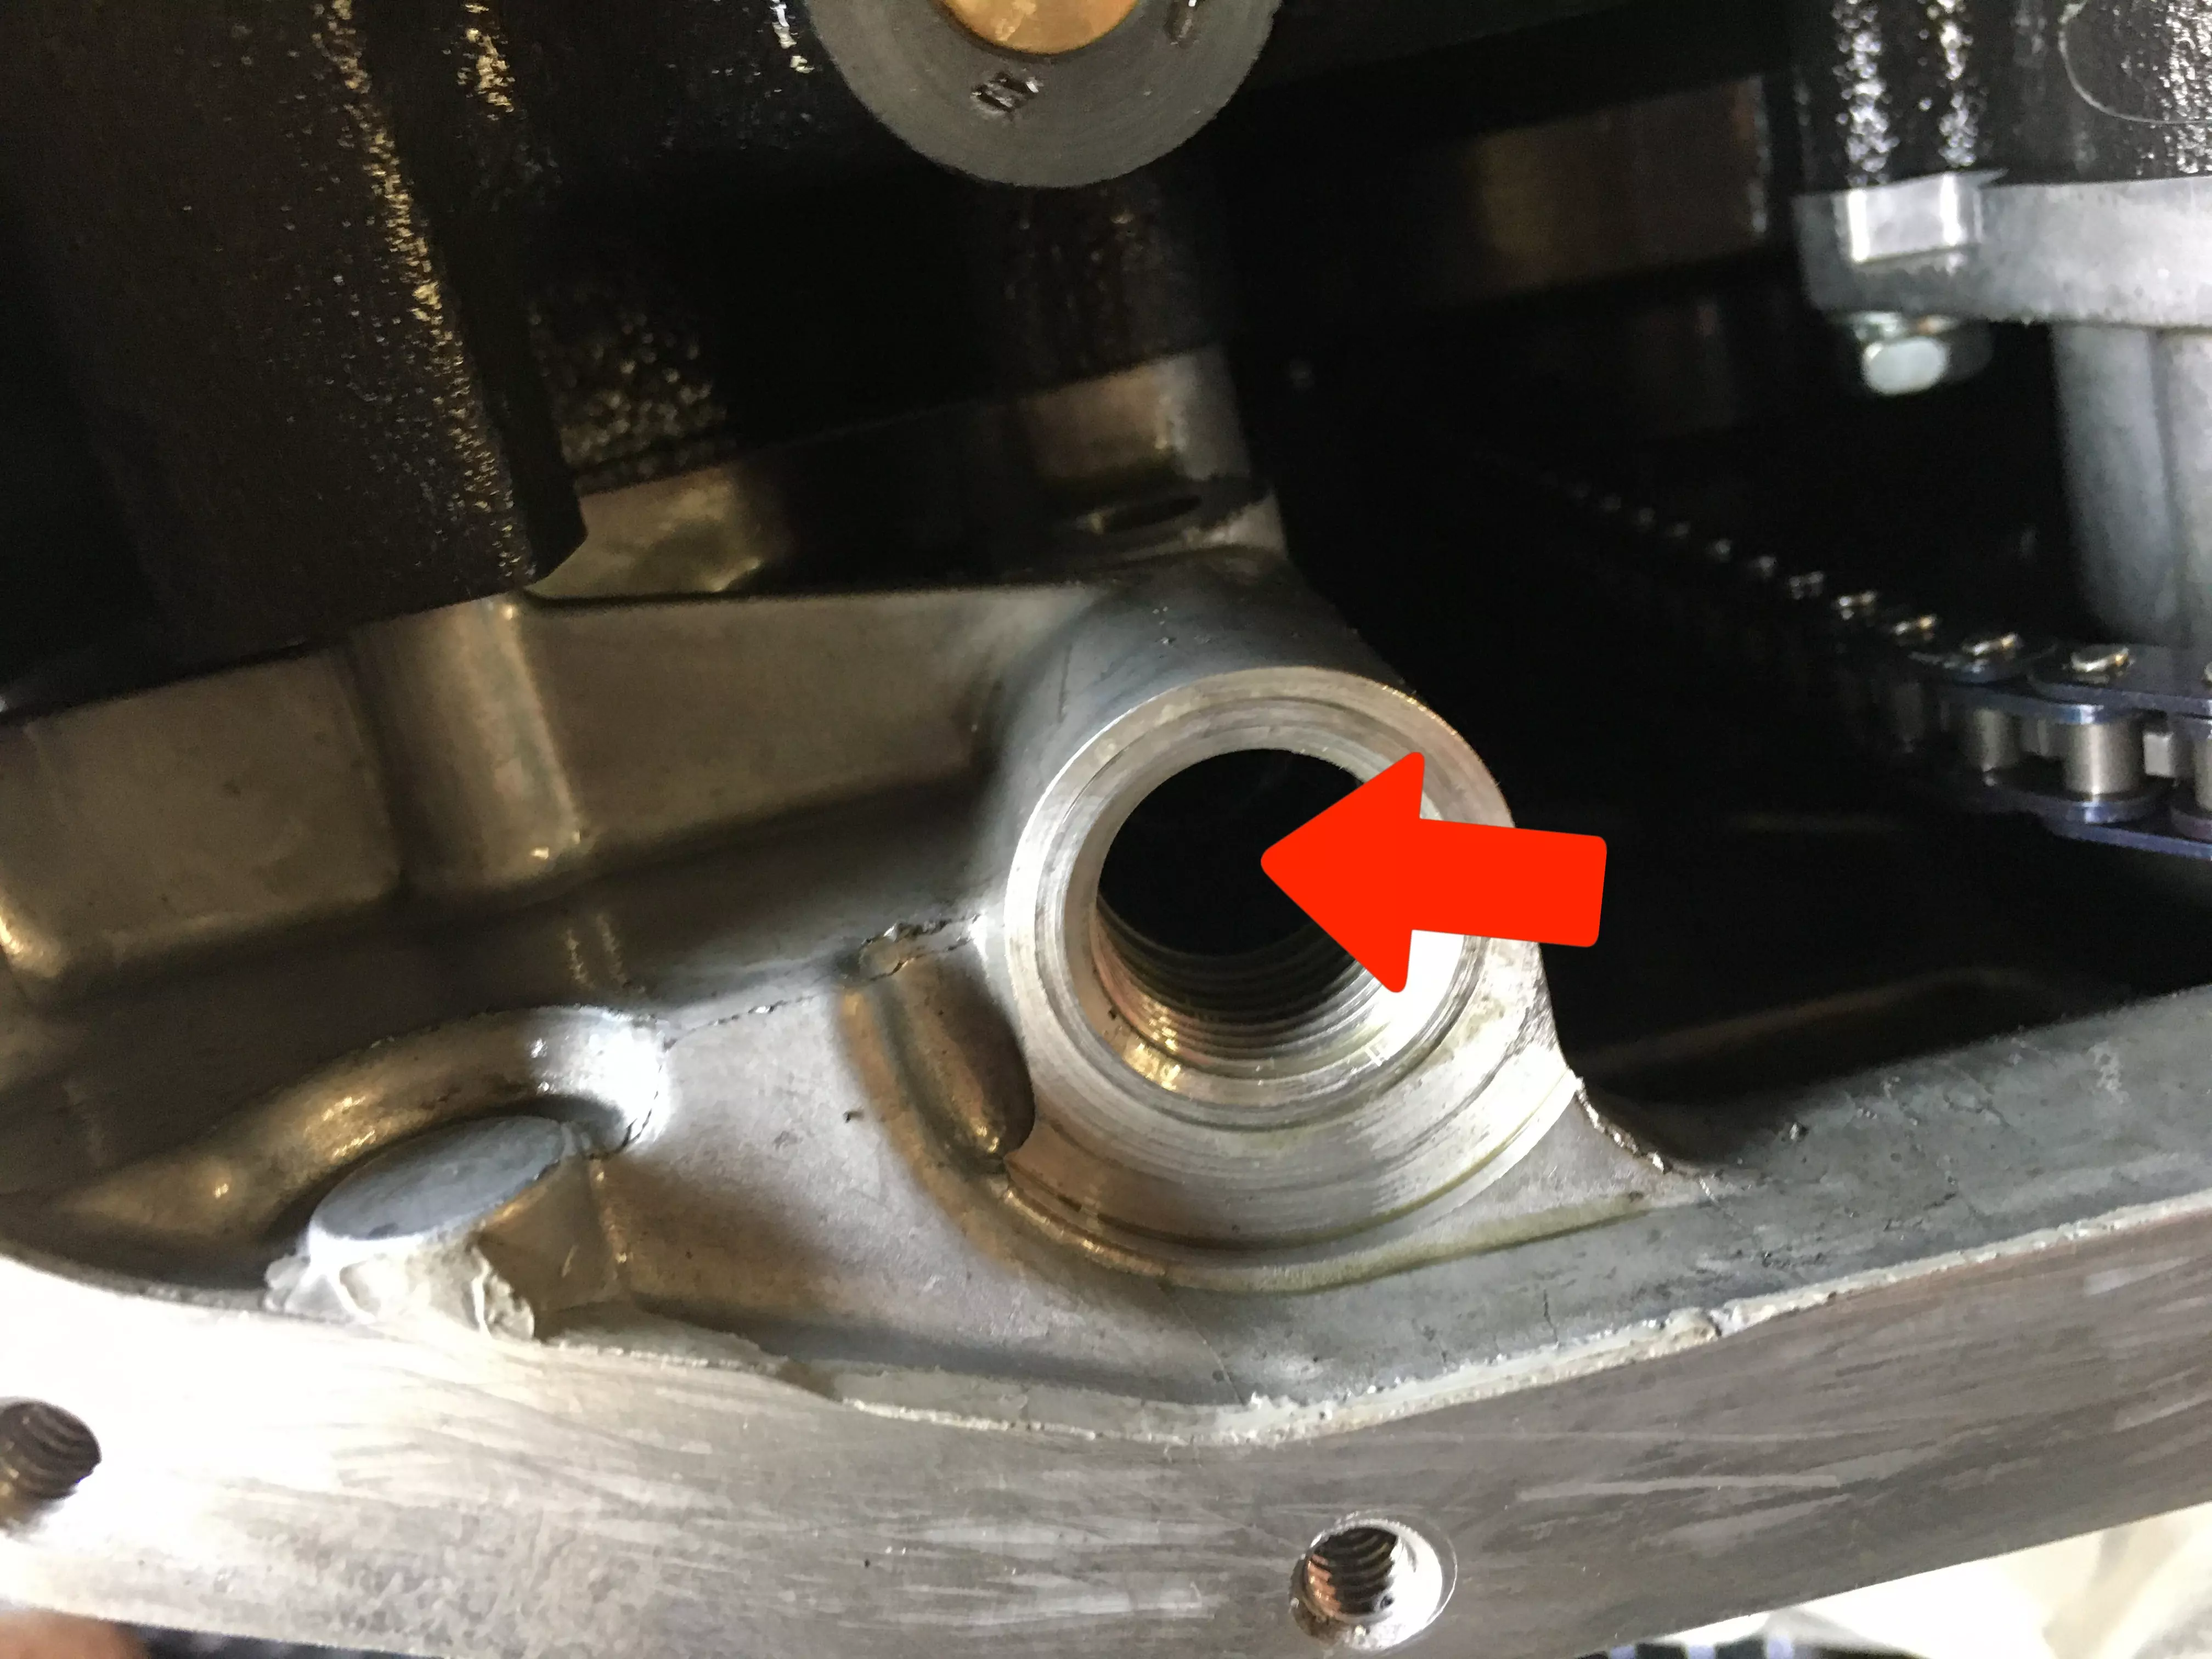
Put the 2 washers in the inside of the cap screw, and e.g. fix it with a little Vaseline or a drop of machines fat.
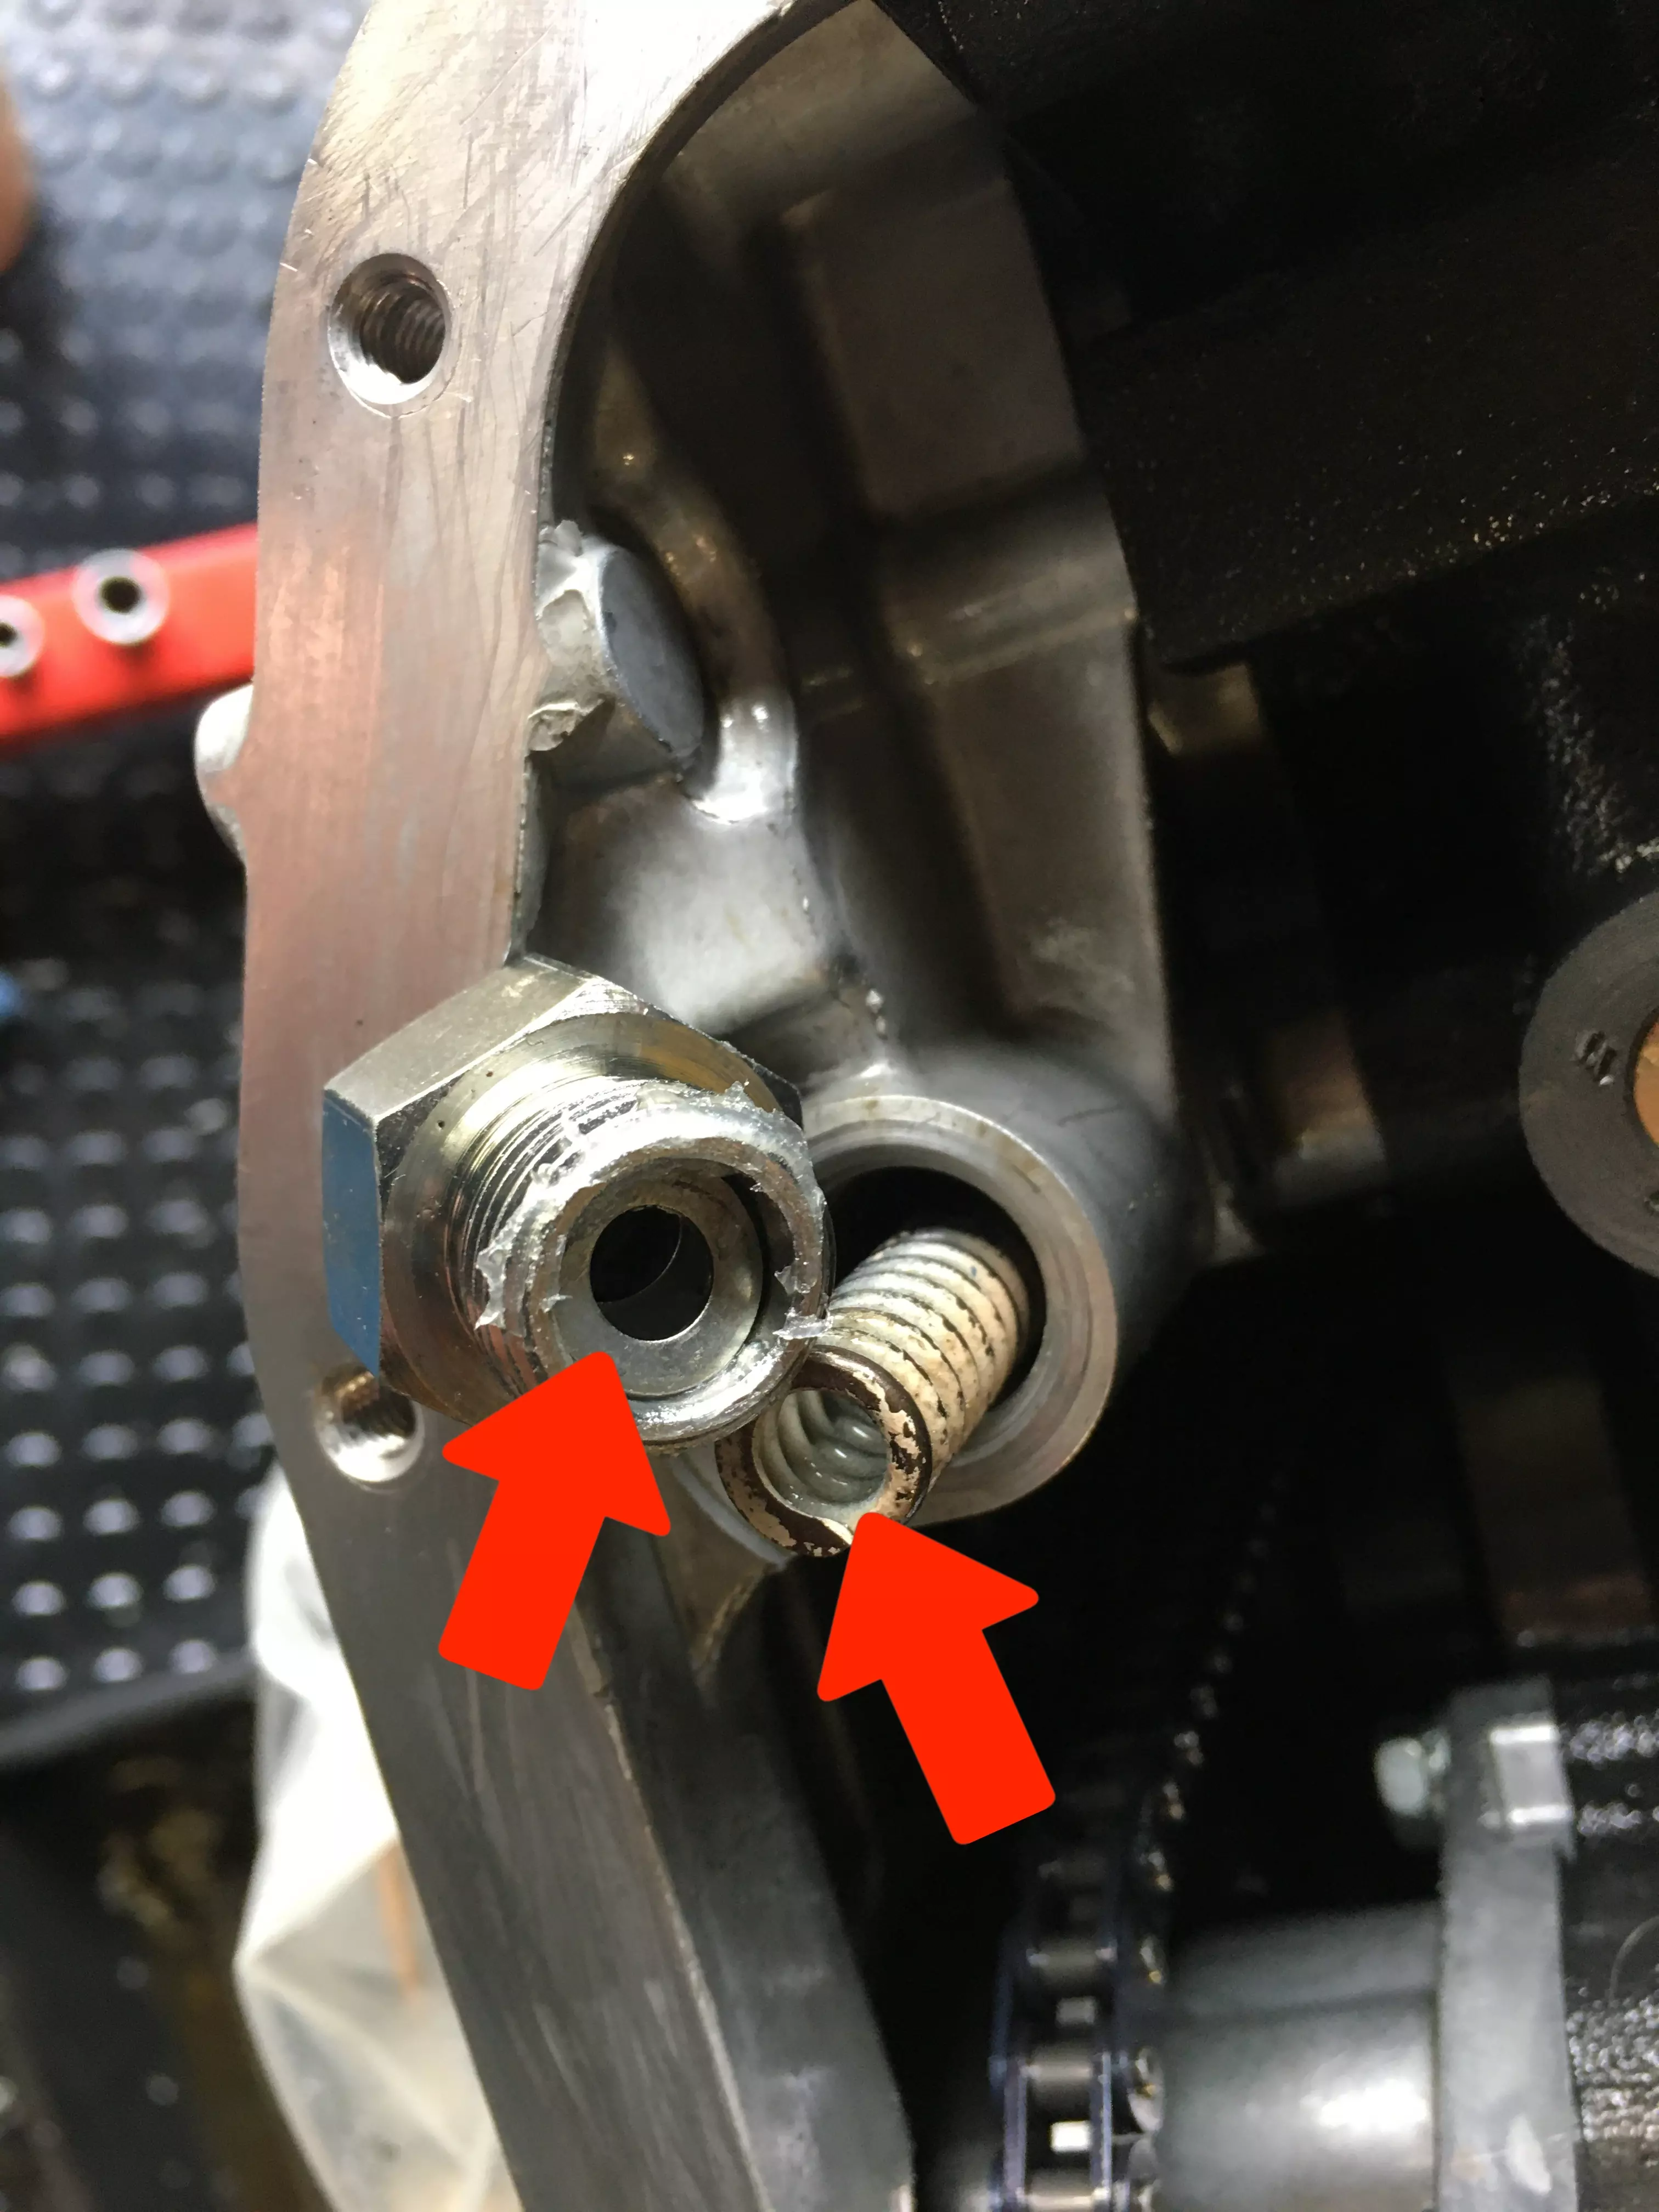
Insert the new WS front control spring into the tube and then attach the cap screw and screw in 2 threads with ladies pressure and tighten with a size 24 open-ended spanner or ratchet.

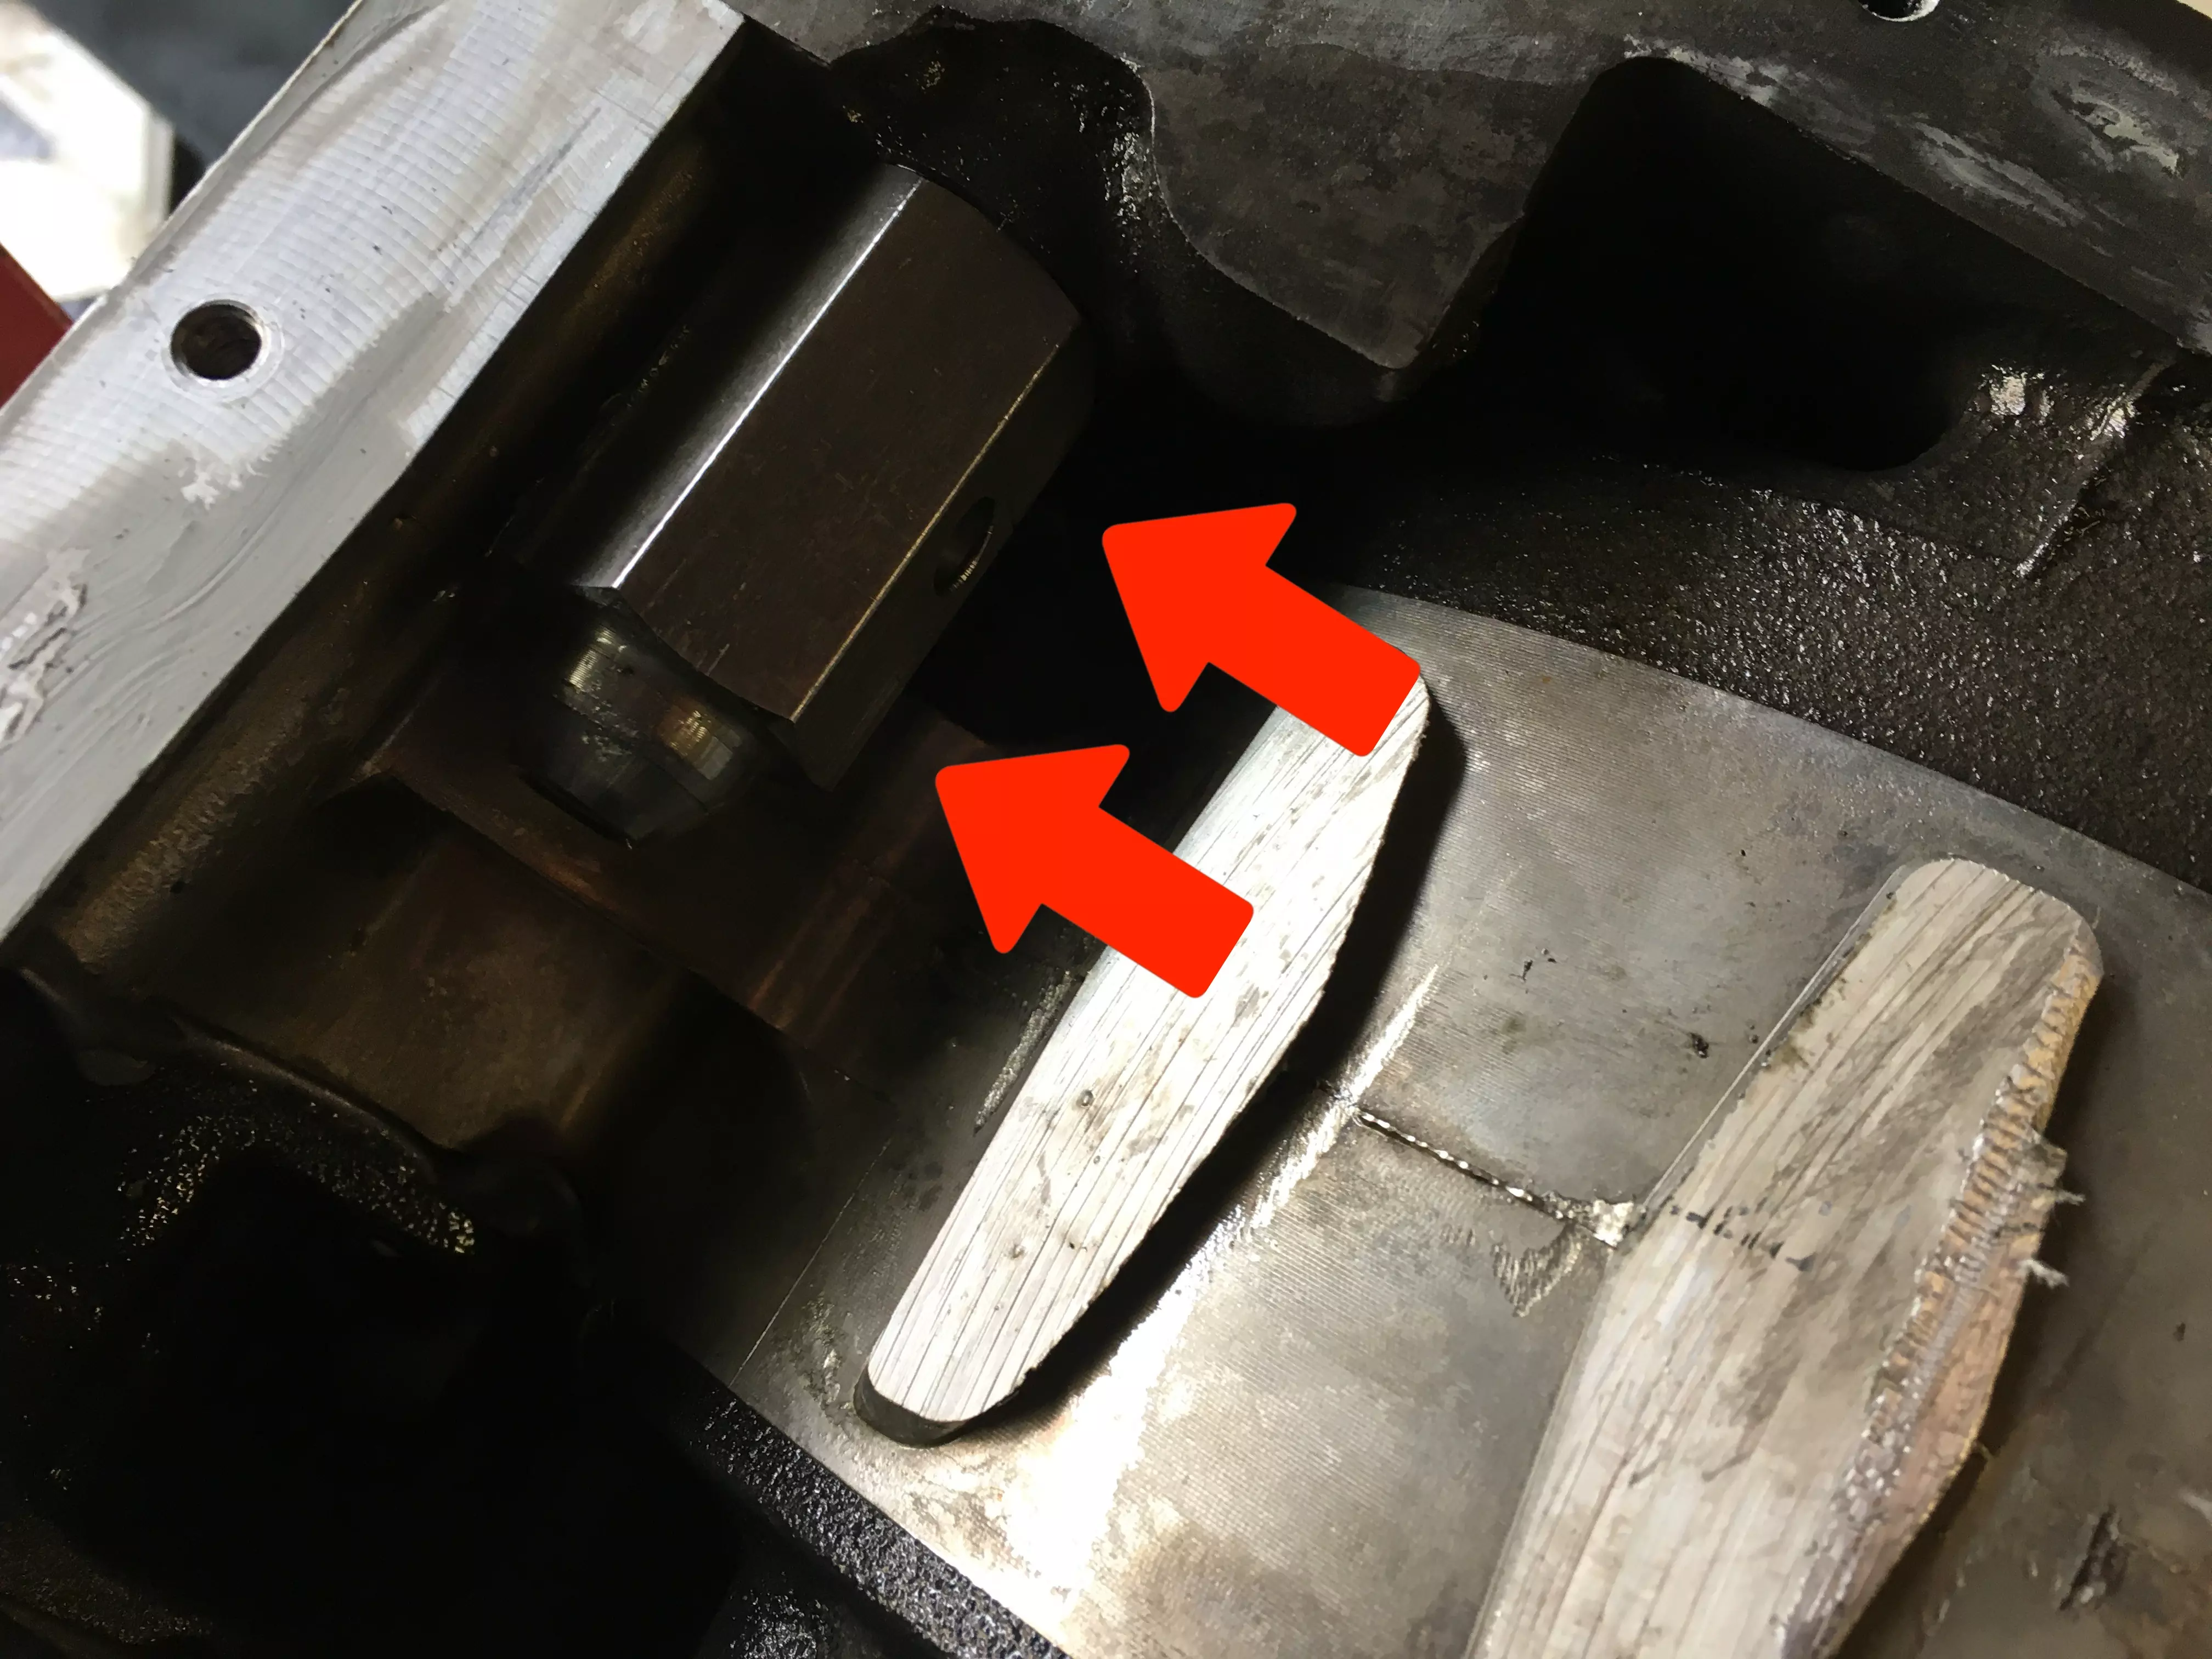
Installation of the rear WS control spring unit:
This is located on the lower left on the rear side plate / iron.
Unscrew the old one counter-clockwise with a 26 mm open-ended spanner and ratchet.
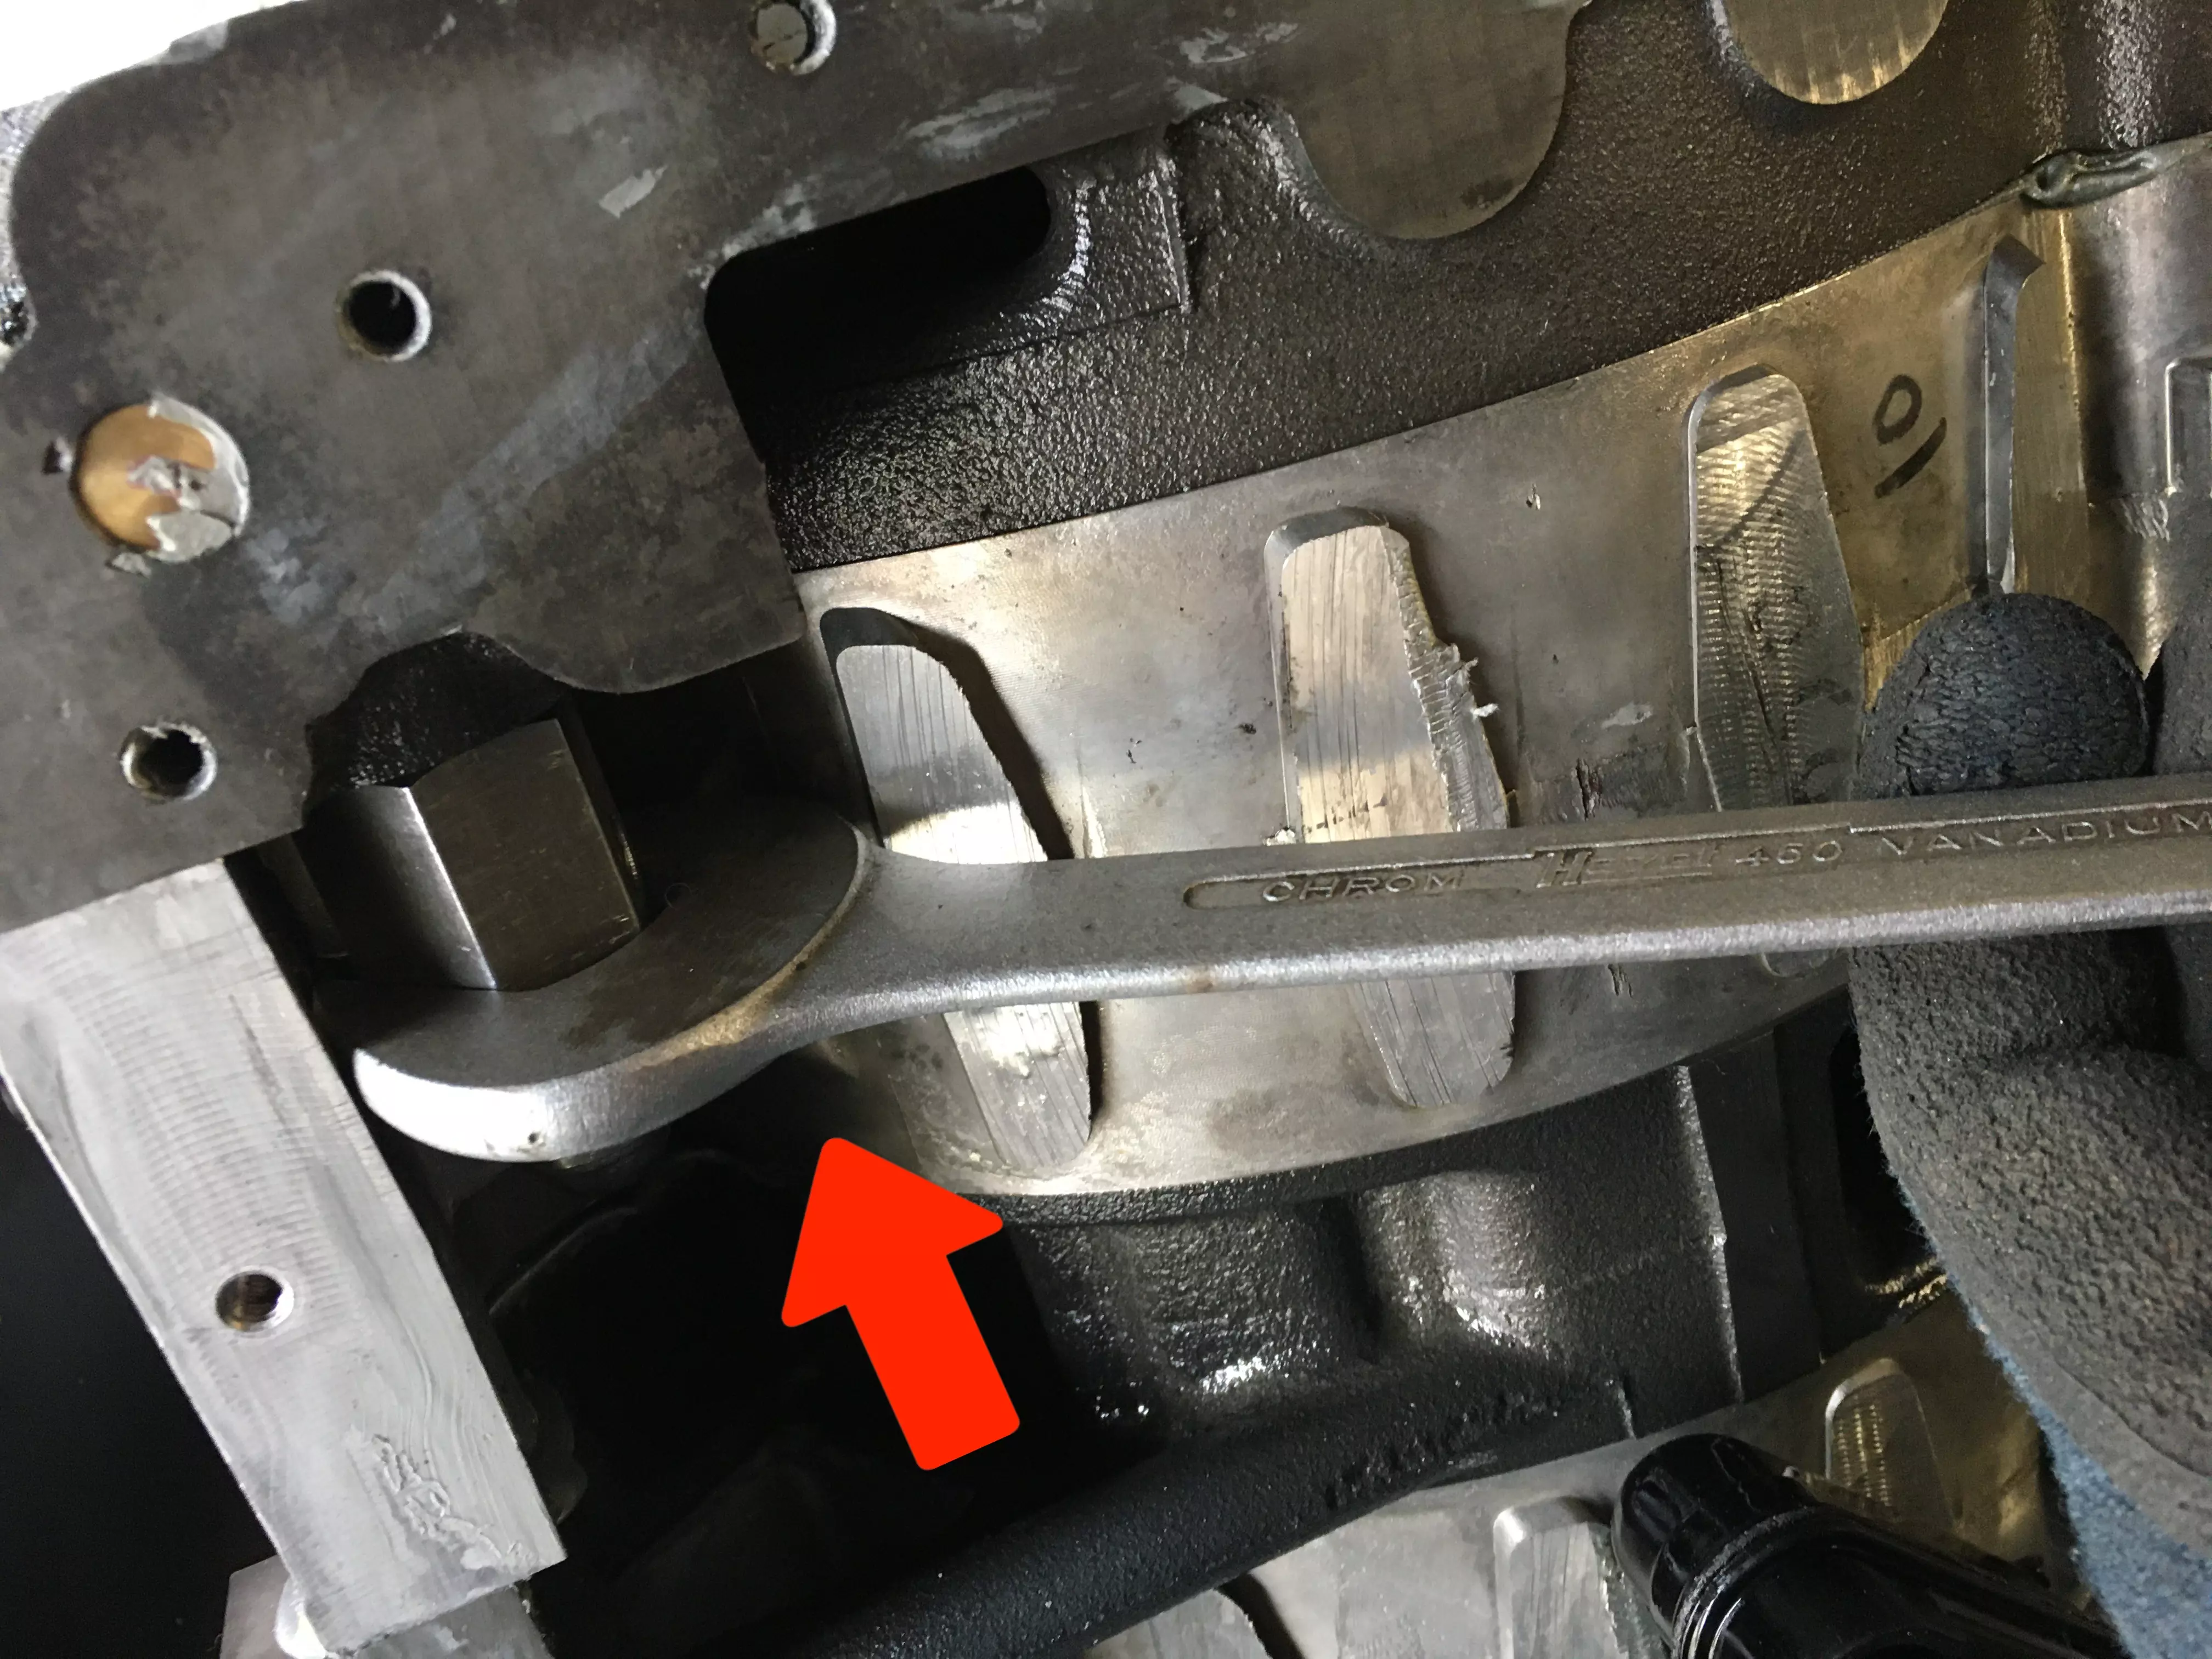
Screw in the new WS control spring unit by hand and tighten with a 26 mm open-ended wrench.

If the oil pan is already off, thoroughly clean it inside with e.g. Clean gasoline and blow compressed air through and dry. Remove the old adhesive residue and then degrease with acetone.
Glue / screw on the oil pan with Reinzosil sealant.
We do not assume any liability for the topicality, correctness, completeness or quality of the information provided. Liability claims against us relating to material or immaterial damage caused by the use or non-use of the information provided or the use of incorrect and incomplete information are fundamentally excluded!